Upload-Download Multiple Resources
(WebDAV & Cyberduck Setup)
These instructions explain how to create a folder on your computer to allow you to drag and drop files and folders between your computer and the Sakai Resources folder in a Sakai site. This is done using a protocol called WebDAV. The WebDAV setup process is different for each operating system and does not require downloading additional software. Please review a couple of important notes before you begin.
NOTE: There must be at least one object (file, folder etc.) in your Sakai site Resources folder before you begin the setup procedure.This procedure needs to be done once for each of the Sakai sites you wish to drag and drop content to and from.
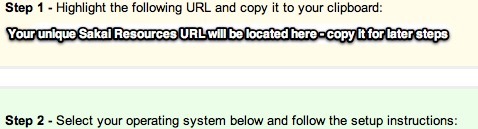
NOTE: A universal step that is required for all of these instructions is to copy the listed URL of the Resources folder for the corresponding Sakai site which can be done by highlighting the URL and then copying it to your clipboard. To retrive this link follow these steps:
-
Under Resources, click Upload-Download Multiple Resources

-
The link is located under "Step 1" on this page
NOTE: There are a number of known issues with WebDAV in Windows & Mac. If you experience problems creating the WebDAV connection, we recommend using Cyberduck for windows or Cyberduck for Mac 10.5 or later, please see further instructions on this page.
WebDAV Setup
.jpg)
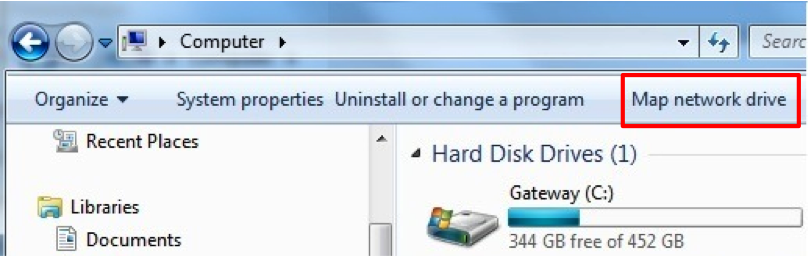
Windows 7 and Vista
-
From the desktop or the Start menu, click Computer.
-
At the top of the window, click Map Network Drive.
-
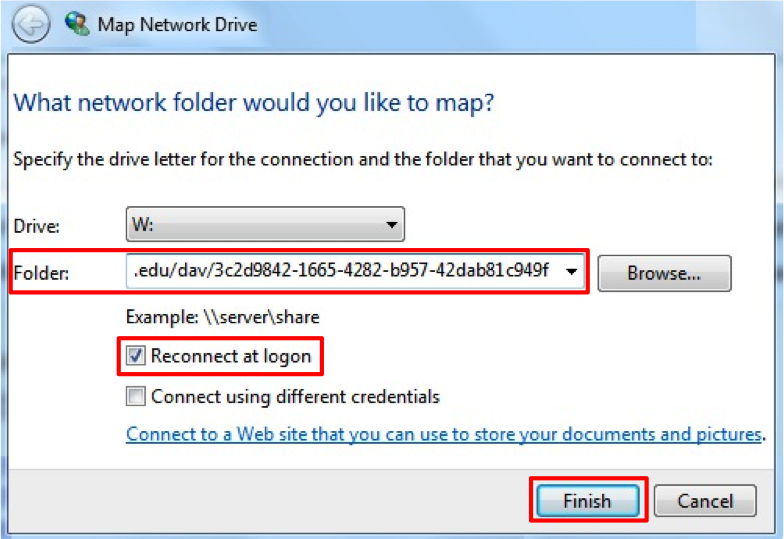
Select a vacant drive letter (e.g., Z) from the Drive drop down menu.
-
In the Folder field, paste the URL corresponding to the Resources folder of your Sakai site.
-
NOTE:Check the box Reconnect at logon to prevent this connection from disappearing when you log off or restart the computer.
-
Click Finish.
-
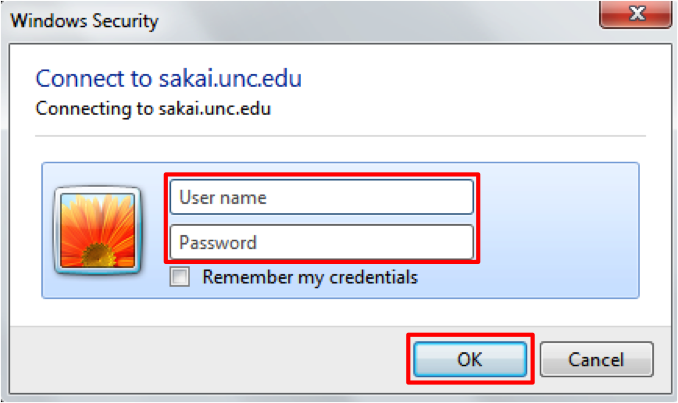
When prompted, enter your Sakai username and password and click OK.
-
NOTE: If you receive an alert such as "The folder you've entered does not appear to be valid," it could be because there are no resources yet in your site. Go to the site and add a file to the Resources folder, then try again.
-
You should now be able to see the content of the Resources folder of your Sakai site and under your computer networks, you will see the mapped connection you have just created. You may now drag files and folders to and from your computer and the Resources folder. You may also rename the mapped connection by right-clicking it and then selecting Rename.
-
NOTE:To prevent problems when your Onyen password changes, do not check the box Remember my credentials.
-
NOTE:If you receive an alert such as "The folder you've entered does not appear to be valid," it could be because there are no resources yet in your site. Go to the site and add a file to the Resources folder, then try again.
Return to Menu
Windows XP
-
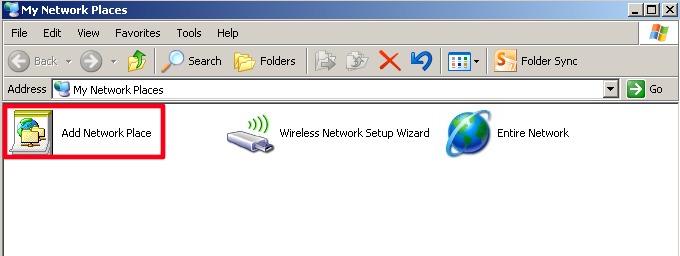
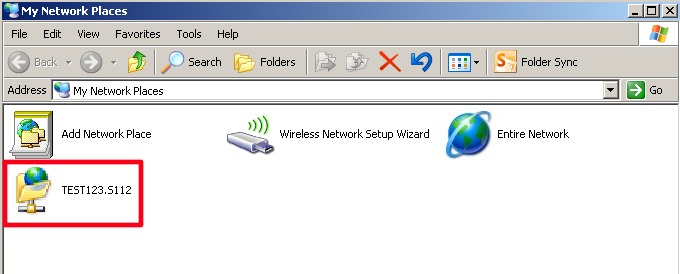
Double-click on the My Network Places icon on your PC desktop or click Start > My Network Places to open the Network Places folder.

NOTE: If this icon is not present in either location, follow these steps:
-
Rigt-click on your desktop, click Properties.
-
Select the Desktop tab
-
Click Customize Desktop
-
Select the checkbox next to My Network Places and click OK.
-
The icon will now appear on your desktop
-
Double-click on the Add Network Place icon and click Next.
-
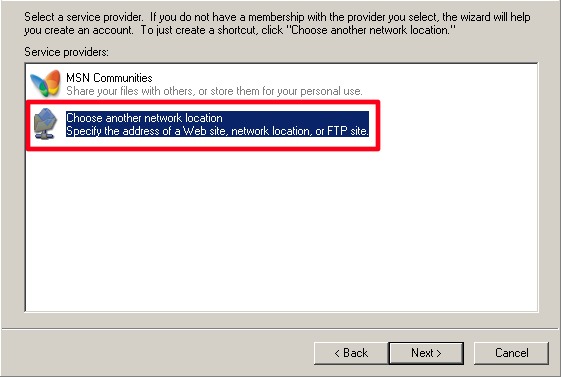
Make sure that Choose another network location is selected and click Next.
-
In the Internet or network address field, paste the URL corresponding to the Resources folder of your Sakai site and click Next.
-
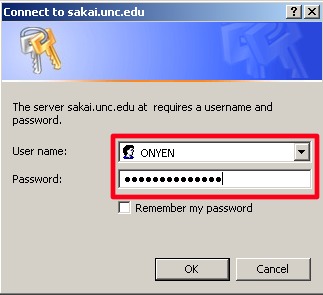
When prompted, enter the Onyen or Non-Onyen user name and password you use to log into Sakai and click OK.
NOTE: To prevent problems when your Onyen password changes, DO NOT check the box Remember my password.
-
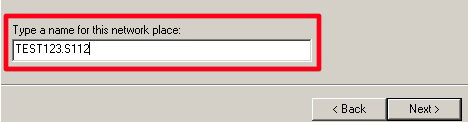
Type the name for this network place, which should be the ID for your Sakai site. This is the name that your computer will use for the network you are creating. Click Next and then Finish to complete the set up.
-
When the setup is complete, the resources folder for your Sakai site will appear under My Network Places. It will also show up under My Network Places in Windows Explorer, where it will act just like any other folder in Windows Explorer. You can now drag files and folders to and from your computer and the Resources folder.
Return to Menu
Mac OS X 10.4 & Up
-
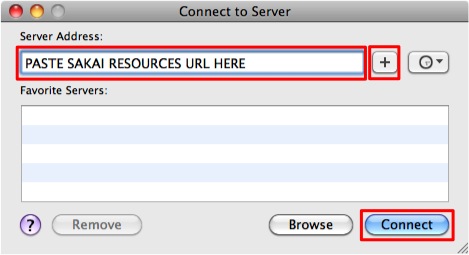
From the Finder, select Go from the menu bar and then select Connect to Server...
-
In the resulting dialog box, paste the URL corresponding to the Resources folder of your Sakai site and click Connect
-
Press the '+' button to save this path for future use and click Connect.
-
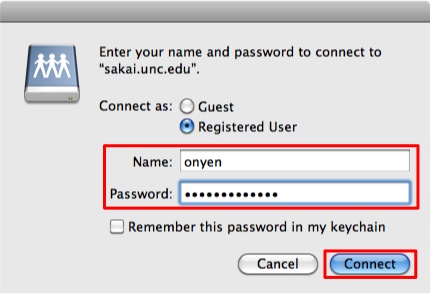
When prompted, enter the Onyen or Non-Onyen user name and password you use to log into Sakai and click OK.
-
You will now see a window on your Macintosh screen that represents the Resources’ folders of your Sakai site. You may now drag and drop files into this window and delete files by dragging them to the Trash.
Return to Menu
Cyberduck Setup
Windows XP, Vista, and Windows 7
-
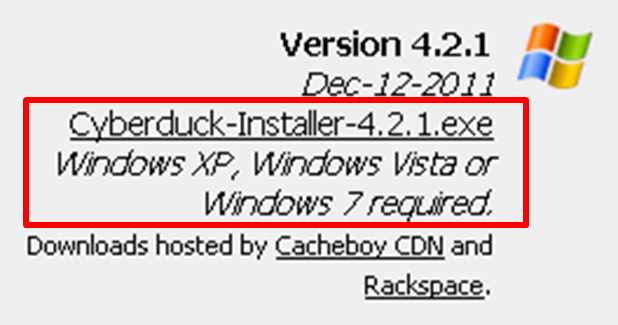
Go to the Cyberduck website, http://cyberduck.ch/ and download Cyberduck for Windows.
-
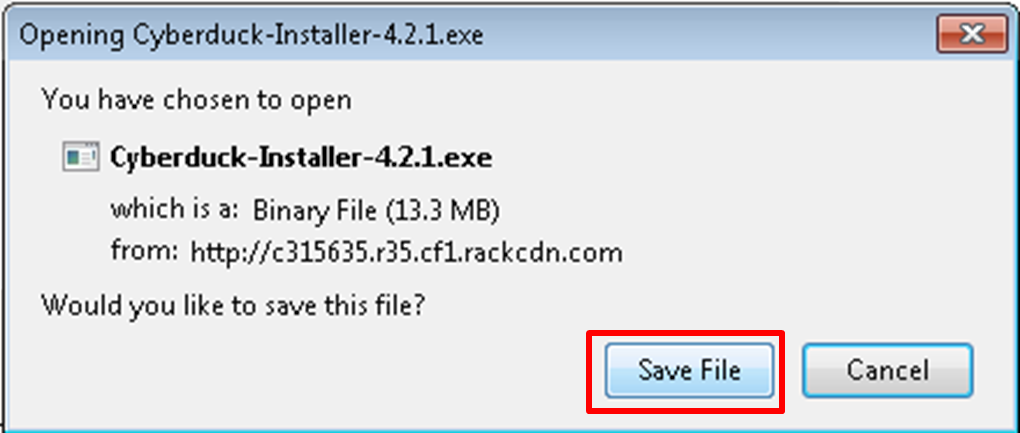
When prompted, click Run or Save File.
-
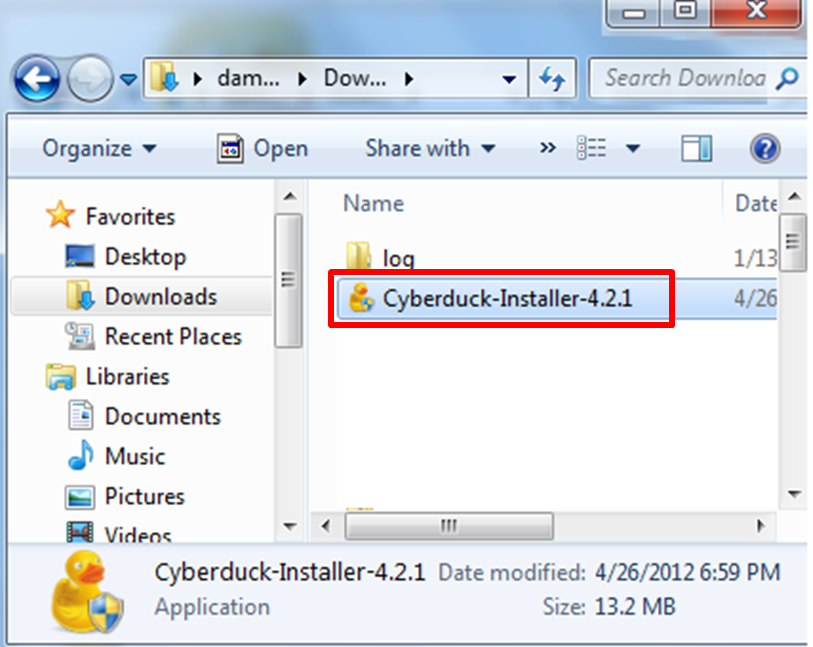
If you saved the file, double-click the saved file to start the setup wizard.
-
Go through the prompts and click Finish to complete the setup wizard.
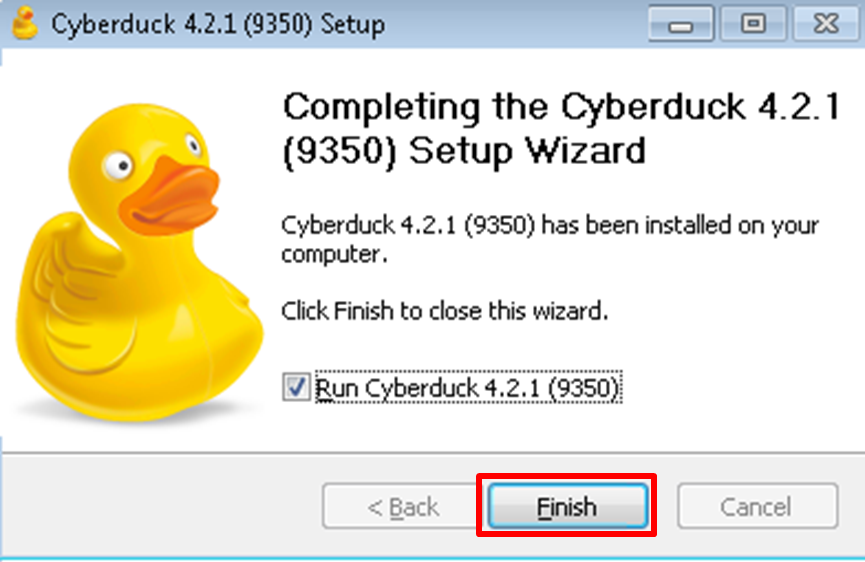
-
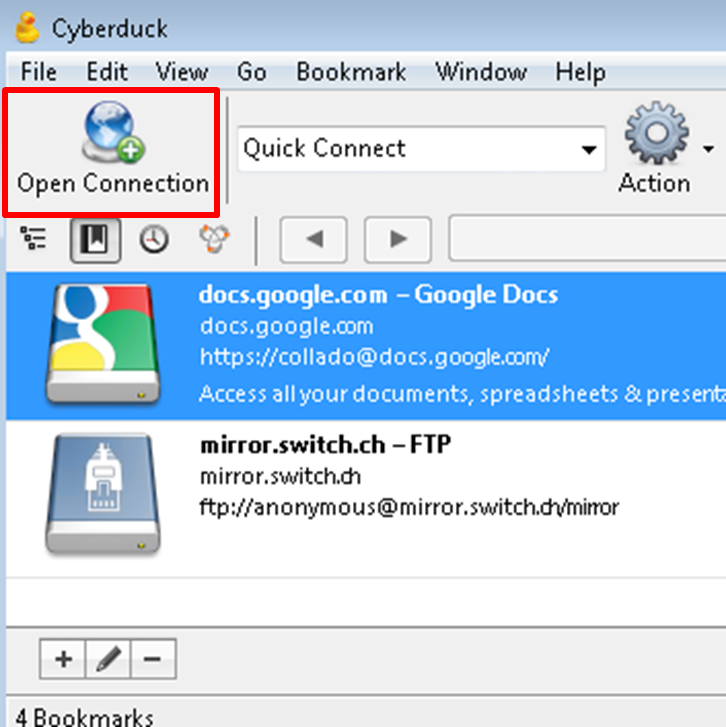
When the setup wizard finishes, Cyberduck will open. Click Open Connection.
-
In the Server field, paste the URL corresponding to the Resources folder of your Sakai site. In the User name and Password fields enter the Onyen or non-Onyen and password you use to log into Sakai and click Connect.
-
NOTE: To prevent problems when your Onyen password changes, DO NOT check the box Save Password.
-
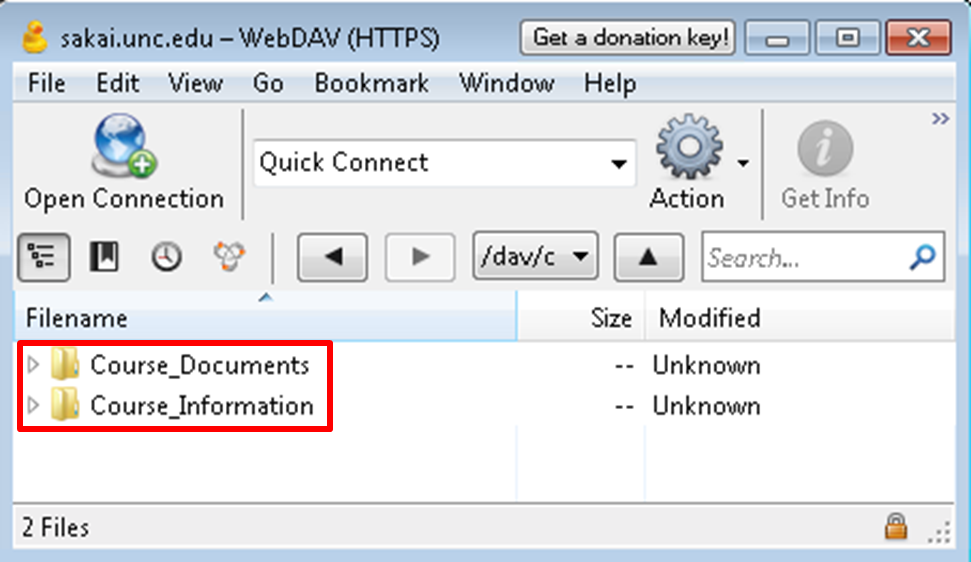
You should now be able to see the content of the Resources folder of the corresponding Sakai site.
-
Select the folder or document you wish to work on and use the Action menu to add or remove folders or documents.

-
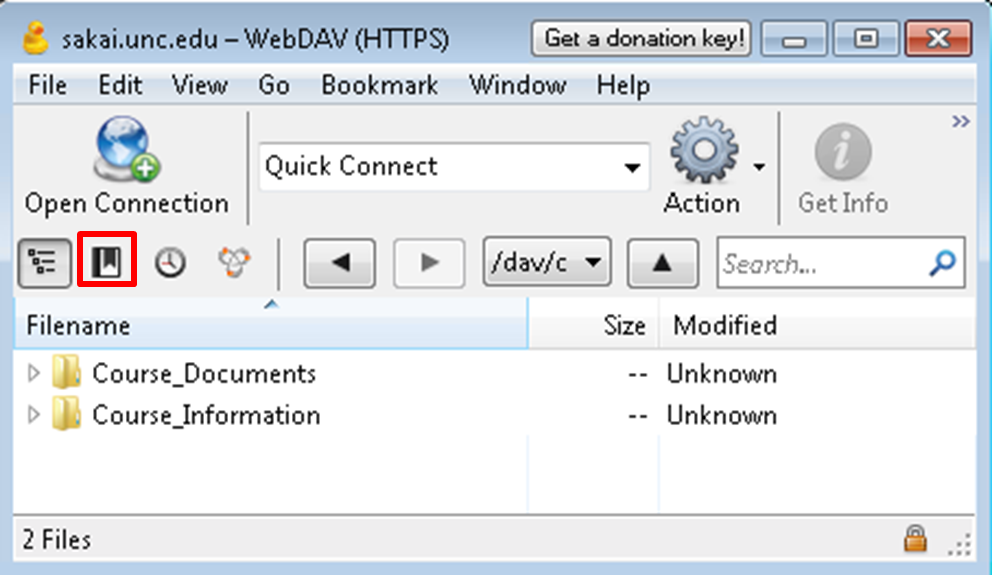
You may wish to bookmark this connection by clicking on the bookmark icon.
-
Click the add bookmark icon.
-
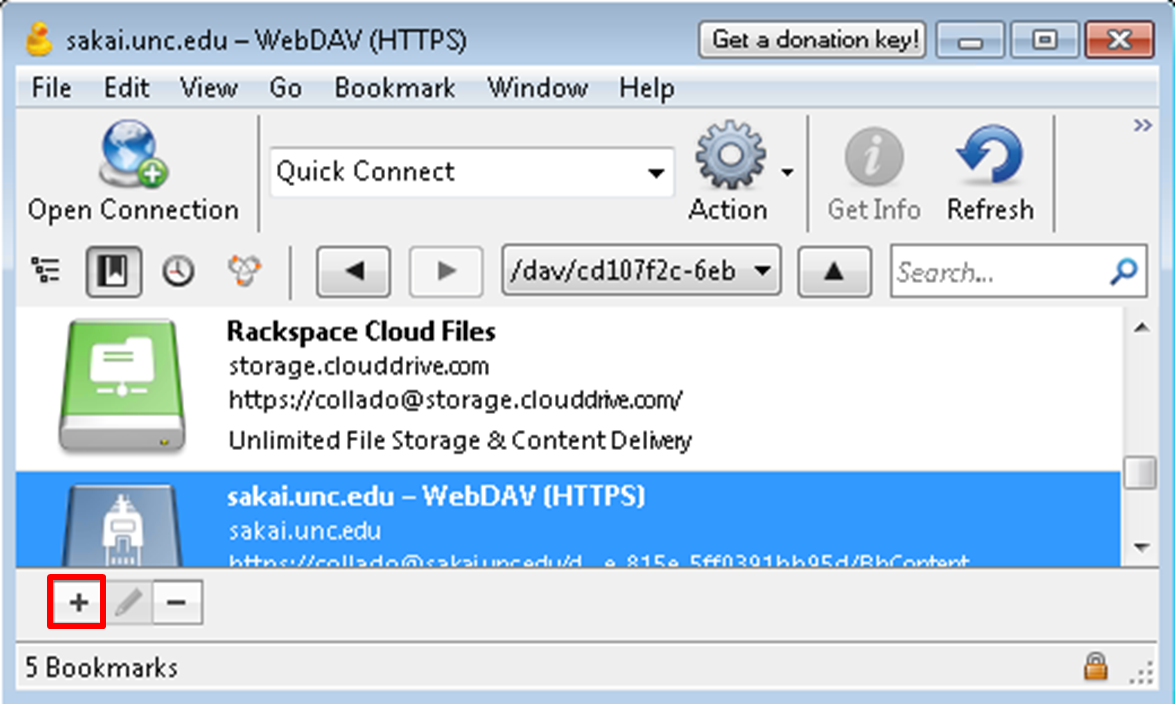
In the Nickname field enter the name of the Sakai site which Resources folder you wish to connect to.
-
To see the bookmarks you have created click the bookmark icon. Select the bookmark for the Sakai site you wish to connect to, the Resources content for the corresponding Sakai site will display. You may now add, remove or organize files and folders as desired.

Return to Menu
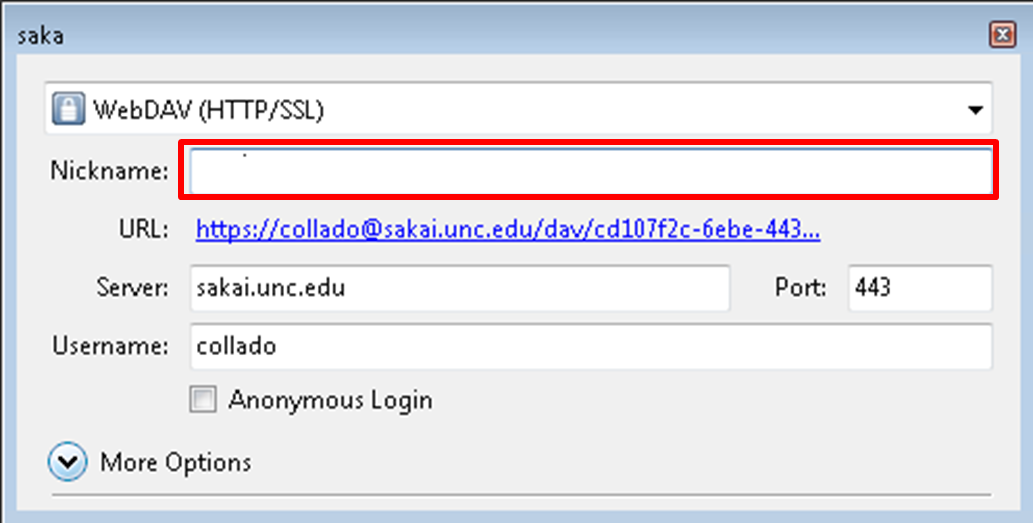
Mac OS X 10.5 and Up
-
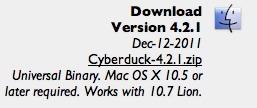
Download the Cyberduck WebDAV client.
-
Decompress the file and double-click on the .dmg file. (Depending on the configuration of your decompression software, the disk image may automatically mount.)
-
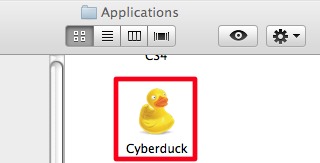
A disk image with a name similar to Cyberduck-2.8.5 should now be available. Simply drag and drop the folder from the disk image to your Applications folder.
-
Open the Cyberduck application in your Applications folder.
-
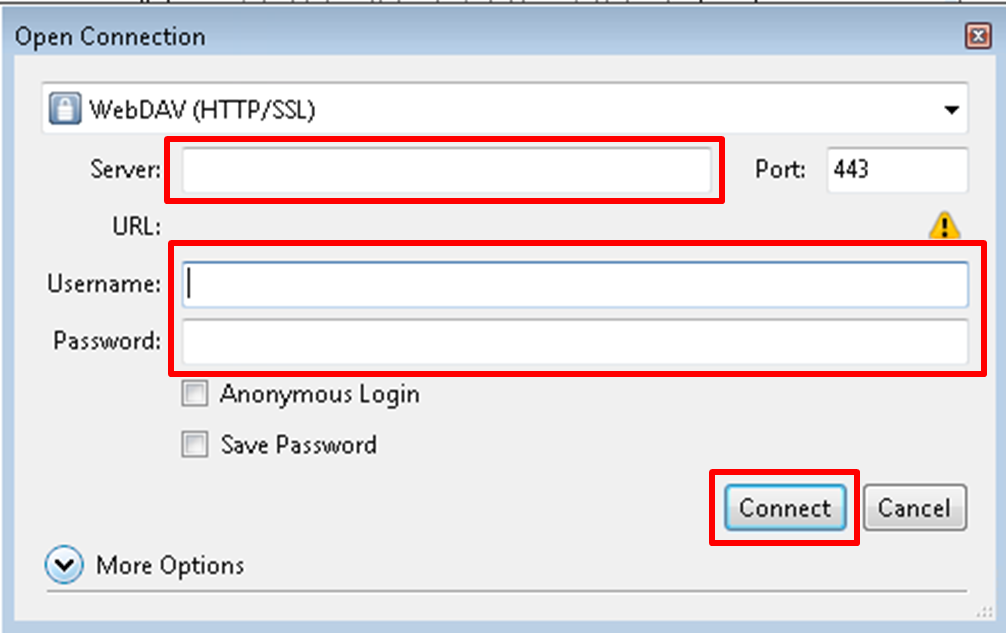
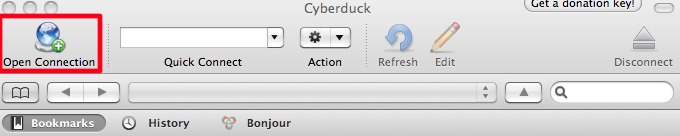
Click the Open Connection button.
-
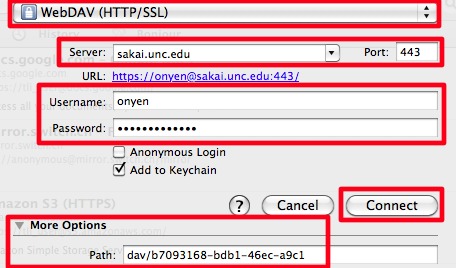
Select WebDAV (HTTP/SSL)
-
In Server, type (or copy and paste): sakai.unc.edu
-
In Port, type (or copy and paste): 443
-
Type in your Sakai username and password
-
Click on More options and type (or copy and paste) in the Folder field the last part of the Sakai Resources URL. For example: [ dav/b7093168-bdb1-46ec-a9c1 ]
-
Now click on Connect.
Return to Menu
Related Resources