


Sakai Tutorials
Frequently Asked QuestionsAbout rosters and course sites
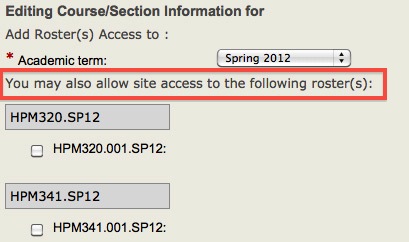
How do I add a roster after the course was created?
1. Select Site Info from the course menu.
4. Browse through the available rosters and check the box for each roster you would like to add to the course site.
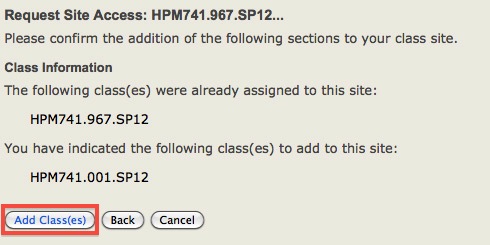
6. Confirm you want to add the rosters by clicking on Add Class(es)
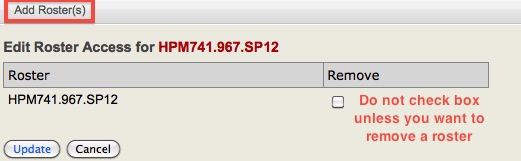
[to top] I selected multiple rosters when I created my course site. How can I remove them and create separate course sites?
Once the extra rosters have been removed, go back to My Workspace > Worksite Setup and continue through creating the new course sites following this tutorial. Note: Only one course site can be created at a time.
[to top] How do I add participants?There are two types of participants: those with an ONYEN and those without an ONYEN. If a non-ONYEN participant is added to your course site then they will automatically receive instructions on logging in to Sakai and a secure password via email, which will give them access. Once they log in to Sakai for the first time then they can change their password and it is highly recommended that they change their password every 3 months. ITS-TLI highly recommends adding participants in ConnectCarolina with their onyen.
[to top]
How do I assign my TA to just one section in my course site?After adding teaching assistants as TAs in ConnectCarolina, they will have access to the Sakai site. Then, you may assign them to a section in Sakai.
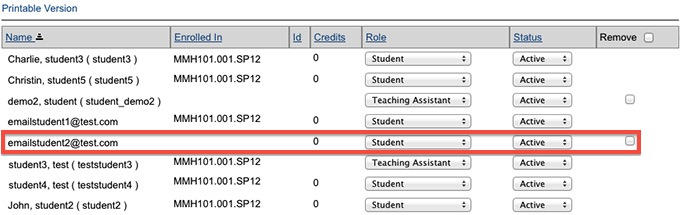
[to top] Why do I have the option to "Remove" some participants and not others?
The short answer is because that individual was manually added to the site and so their access is manually managed. In this example, emailstudent2@test.com is not "Enrolled In" (second column in image) the course so they did not register via ConnectCarolina. If you manually add a participant and then they officially register for the course, their status in the site will update to show they are enrolled in the course and you will not be able to remove them in Sakai. Any information or data that was submitted while unofficially being in the course site will still be there. [to top] I teach a cross-listed course but only see one roster in Sakai. Where are my other rosters?Cross-listed courses will display as one roster in Sakai, taking the course ID of the sponsoring department. We recommend comparing your list of site participants in Site Info to your rosters in ConnectCarolina to verify all users have been added. Note that it may take up to 24 hours for the Sakai roster to update. [to top]
Can a roster be attached to multiple sites?No. The course rosters are coming from the University Registrar and can only be attached to one Sakai site at a time. [to top] |

| Sakai home | policies | maintenance | Sakai tools |
© 2015 The University of North Carolina at Chapel Hill Sakai Tutorials by University of North Carolina at Chapel Hill is licensed under a Creative Commons Attribution-Non Commercial-Share Alike 3.0 Unported License. |